Marcus had his Berkeley garage floor coated three years ago. Looked great for about eighteen…
Concrete Surface Preparation for Epoxy Flooring in Cringila: A Professional Methods Guide for Industrial Facilities
What’s the single biggest reason epoxy flooring fails in Cringila’s industrial facilities — and why does it have nothing to do with the epoxy itself?
I’ve walked through more than a few Port Kembla corridor facilities where a facility manager has pointed at a floor bubbling and peeling apart, shaking their head. A floor that was supposed to last a decade. Gone in under twelve months. And every single time, when you trace it back, it comes down to the same thing — concrete preparation epoxy Cringila contractors either cut corners on, or skipped entirely.
Up to 80% of epoxy coating failures link directly back to what happened — or didn’t happen — before a single litre of product was mixed. For facility managers running production lines, chemical storage bays, or warehousing operations along the Cringila and Port Kembla manufacturing corridor, that’s an expensive lesson to absorb after the fact.
Cringila’s industrial floors don’t get an easy ride. Heavy forklift loads, chemical spills from steel processing operations, and the Illawarra coast’s relentless humidity will expose every shortcut taken during surface preparation — usually within the first year.
This guide walks through exactly what professional surface preparation looks like, what questions you should be asking your contractor, and why every single step determines how long your floor actually lasts.
Why Surface Preparation Determines Epoxy Flooring Success in Cringila
The bond between epoxy and concrete is mechanical. There’s no chemistry doing the heavy lifting — the epoxy needs something to grip onto at a microscopic level. No surface profile, no adhesion. It’s that simple.
In Cringila’s industrial environment, the consequences of poor prep are amplified. Port Kembla corridor facilities deal with heavier point loads, more aggressive chemical exposure, and higher ambient humidity than your average warehouse. Conditions that would stress a well-prepped floor are conditions that will destroy a poorly prepped one.
The cost of failure isn’t just the reapplication bill — though that’s significant. It’s the production downtime, the safety incidents when a delaminating floor becomes a trip hazard, and the compliance headaches that come with a workplace floor that no longer meets WHS standards.
Understanding Concrete Surface Profile (CSP) Standards
The ICRI (International Concrete Repair Institute) CSP scale runs from CSP 1 through CSP 10 — from near-polished smooth through to heavily scarified rough profiles. For industrial epoxy systems in Cringila facilities, you’re generally targeting CSP 3 to CSP 5. That’s a profile roughly equivalent to coarse sandpaper to a heavily wire-brushed surface.
Below CSP 3 and the epoxy doesn’t have enough mechanical anchor points. Above CSP 5 for lighter coating systems and you risk the profile telegraphing through the finished surface. Profile is verified on-site using replica putty tape (Testex tape) and cross-referenced against ICRI photographic standards.
The Hidden Cost of Skipping Proper Preparation
Delamination. Bubbling. Joint edge chipping. These aren’t coating product failures — they’re prep failures wearing a coating’s name. Reapplication of an industrial floor system typically costs more than the original installation when you factor in removal, waste disposal, and extended facility downtime.
For Cringila facility operators, there are also insurance and compliance implications. A floor that fails within warranty because preparation protocols weren’t followed can leave you in a dispute that’s difficult to resolve when there’s no documented QC trail.
Diamond Grinding vs Shot Blasting — Choosing the Right Method for Your Cringila Facility
Two mechanical preparation methods dominate industrial floor prep. Neither is universally better — the right call depends on your floor’s condition, contamination type, coating system, and what your facility can accommodate during the prep process.
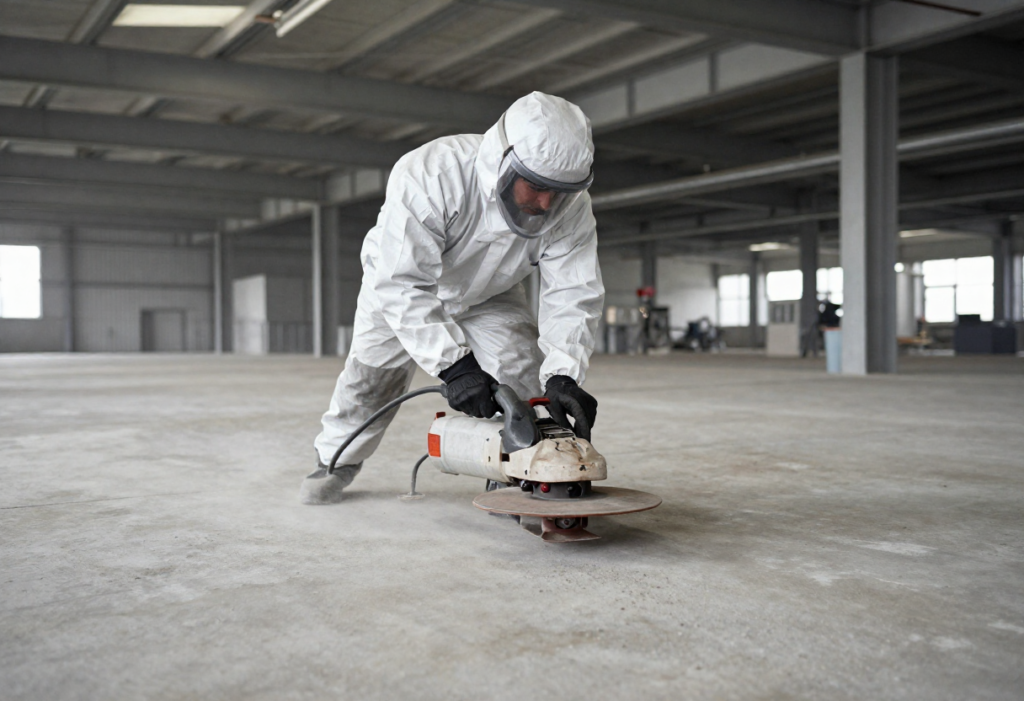
Diamond Grinding — Applications and Advantages
Diamond grinding uses rotating diamond-segmented heads to remove the surface laitance layer and open the concrete’s pore structure. It’s well-suited to smooth concrete surfaces, light contamination, confined areas, and multi-level facilities where shot blasting equipment can’t be moved easily. The limitation is speed — on heavily contaminated floors it’s a slow process, and the fine dust it generates needs proper containment to meet SafeWork NSW silica dust management requirements.
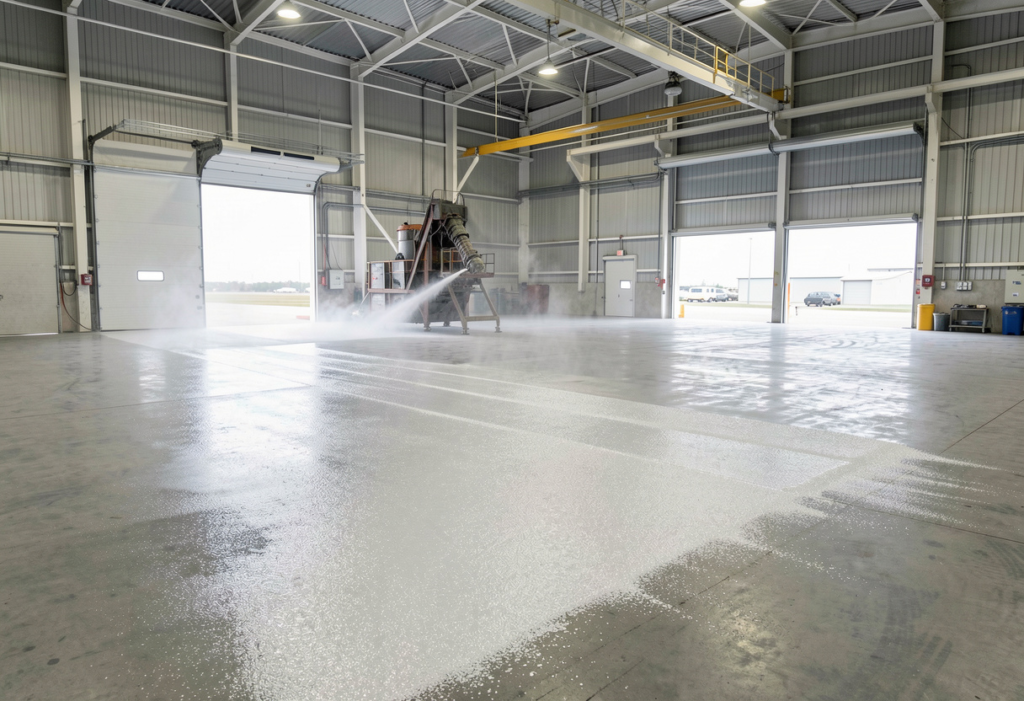
Shot Blasting — Applications and Advantages
Shot blasting propels steel shot at high velocity across the slab surface, mechanically profiling it at a much faster rate than grinding across open areas. It’s the preferred method for large open warehouse floors and surfaces with heavier contamination. The limitation: it’s not appropriate for thin slabs or areas near sensitive equipment or machinery that can’t be protected from steel shot.
Combination Approaches for Complex Facilities
Many Cringila industrial facilities aren’t one-method jobs. A large open manufacturing bay might be shot blasted for speed and coverage, while column bases, tight corners, and loading dock areas are diamond ground. Method selection should be area-specific, not a blanket site-wide decision.
| Factor | Diamond Grinding | Shot Blasting |
| Best for | Confined spaces, light contamination | Large open floors, heavy contamination |
| Speed | Slower | Faster |
| Dust management | Fine dust — containment required | Steel shot — contained within machine |
| Thin slabs | Suitable | Not recommended |
| Profile achieved | CSP 2–4 | CSP 3–6 |
Contamination Removal in Cringila Manufacturing Facilities
Contamination is the most common hidden cause of epoxy failure in industrial environments — and in Cringila specifically, it’s a serious problem. Steel processing oils, hydraulic fluids, chemical residues, and salt ingress from the Illawarra coast all find their way into concrete slabs over years of facility operation. The critical thing to understand is that contamination penetrates below the surface. Mechanical abrasion alone won’t fix it.
Identifying Contamination Types
Oil and grease are the most common in manufacturing bays. Chemical contamination varies depending on what’s been processed or stored. Salt crystallisation is a real issue in coastal Illawarra facilities — salt migrates into the slab and causes adhesion failure from beneath. Previous coating residues and old adhesives add another layer of complexity.
A simple field test: pour a small amount of water onto the concrete surface. If it beads, you’ve got oil contamination. If it absorbs quickly, the surface is clean. It’s not a definitive test, but it’s a useful quick indicator before more thorough investigation.
Chemical Degreasing and Remediation Protocols
Industrial-grade degreasers are applied with appropriate dwell times, then extracted using hot water pressure washing. Heavily contaminated floors often need multiple passes — the degreaser needs to penetrate as deep as the contamination has travelled. In some cases, the level of contamination requires specialist remediation before standard prep can even begin.
Dealing with Existing Coatings and Adhesives
Existing epoxy, paint, or tile adhesive needs full removal before any new system goes down. Heavy coating removal typically requires scarifying — a more aggressive mechanical process than grinding. In older Cringila facilities, it’s worth testing adhesives for asbestos-containing materials before any removal work starts. This isn’t optional — it’s a legal and safety requirement.
Moisture Testing and Mitigation Strategies for Illawarra Industrial Floors
Moisture is the primary enemy of epoxy adhesion in coastal industrial environments, and Cringila’s position near Port Kembla and the Illawarra coastline elevates both ambient humidity and the moisture content sitting inside older concrete slabs. As of 2025, AS 1884 remains the governing Australian standard for moisture testing prior to floor coating application.
Moisture Testing Methods and AS 1884 Compliance
The gold standard is in-situ relative humidity probe testing — probes are inserted into the slab at the correct depth and left to equilibrate before readings are taken. Calcium chloride tests are less reliable in Australian conditions and don’t account for the full moisture profile through the slab depth.
Most industrial epoxy systems specify a maximum of 75% RH. Some moisture-tolerant systems allow higher readings, but these aren’t a substitute for proper mitigation. For large industrial floors, testing frequency matters — adequate test points per area are required to get a representative picture of the slab.
Moisture Mitigation Solutions
Epoxy moisture barrier primers can manage moderate moisture levels, but they have limits. Surface-applied moisture suppressants offer an additional layer of protection in coastal environments. When slab moisture is severe, full slab remediation may be required before any coating work is viable — and a professional contractor will tell you that upfront rather than apply a coating and hope for the best.
Crack Repair and Joint Treatment for Industrial Epoxy Floors
Untreated cracks will mirror through any epoxy coating system. Every time. Joint treatment is one of the most technically demanding aspects of industrial floor preparation, particularly in Cringila facilities carrying heavy forklift traffic where joint edge chipping is a constant problem.
Classifying Cracks Before Treatment
The first step is distinguishing dormant cracks from active ones. Dormant cracks have stopped moving — they can be routed and sealed with rigid epoxy filler and ground flush. Active cracks are still subject to movement and require flexible polyurethane injection to accommodate that movement without cracking the repair.
Structural cracks, shrinkage cracks, and surface crazing all require different treatment approaches. A professional contractor assesses each crack type before reaching for a product.
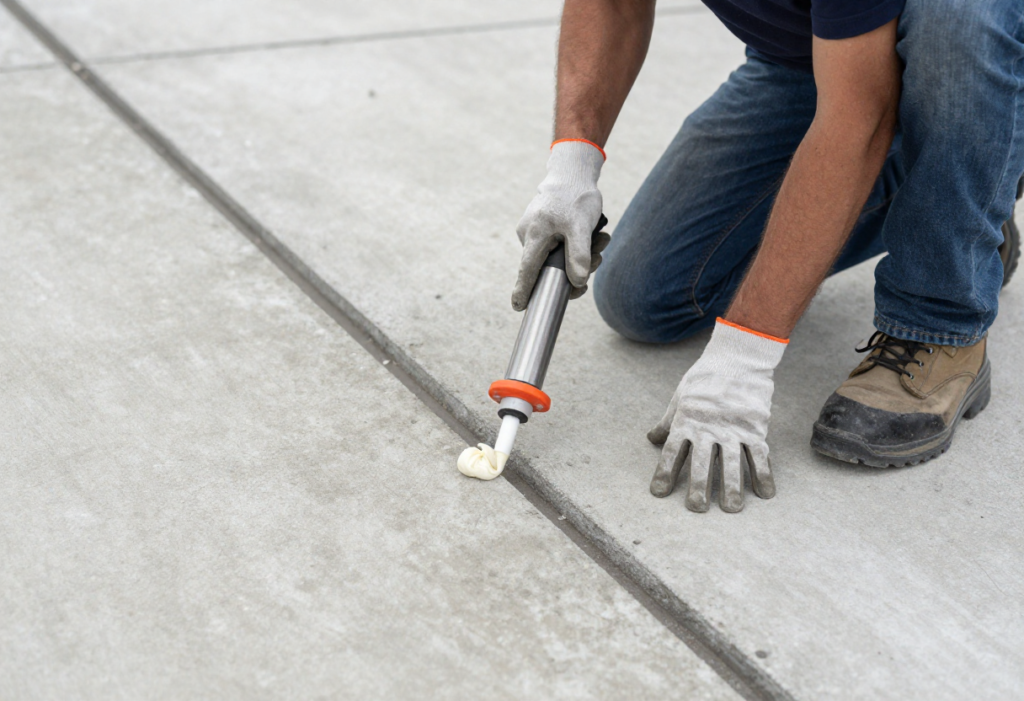
Control Joint and Expansion Joint Treatment
Control joints cannot simply be filled with rigid epoxy — the joint exists to allow movement, and a rigid fill will fail. Semi-rigid polyurea joint fillers are the correct solution, maintaining some flexibility while providing a trafficable surface. In heavy forklift traffic areas, armoured joint nosings protect the joint edges from chipping under repeated wheel loads. Joint treatment should be documented in facility maintenance records.
Quality Control in Surface Preparation — What Professional Contractors Do Before Coating Begins
QC isn’t a formality — it’s the checkpoint that protects both the contractor and the facility operator. Professional contractors document their QC results. If yours doesn’t, that’s worth asking about.
Pull-Off Adhesion Testing
Pull-off testing applies a calibrated load to a test dolly bonded to the concrete surface. It measures the tensile strength of the substrate and confirms it can support the epoxy system’s bond requirements. Minimum acceptable values vary by system — your contractor should specify what they’re testing against before they start.
Final Pre-Coating Checklist
Before any epoxy goes down, the surface needs a final dust and debris removal pass using industrial vacuum equipment and tack cloth. A final moisture reading is taken. Ambient temperature and dew point are checked — in Illawarra’s humid conditions, dew point can be surprisingly close to surface temperature, which affects how the epoxy cures. Contractor sign-off documentation should be completed before application begins.